Sleepy Piggy Sushi Tutorial
Ingredients
- One fish sausage
- Seaweed/nori sheet
- Cooked rice or sushi rice
- Pink furikake or ketchup
Step 1: Wrap the fish sausage with nori
Step 2: Made two semi circle for piggy eyes and triangles for ears
Step 3: Filled the pink rice on top and spread evenly then put the fish sausage middle
Step 4: Arrange the sleepy eyes next to fish sausage and make sure filled up the holes and cover all before roll.
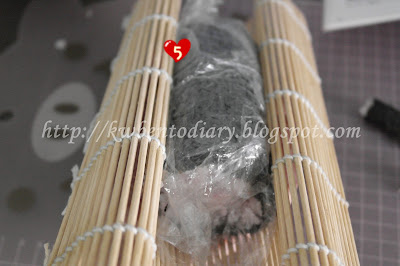
Step 5: Time to rolled ^_^
Step 6: Remember the two triangle for ears? Just cut out and stick them together with piggy after cut out the sushi. Sorry for one missing picture for the cut out triangle steps :p
Step 7: Now use the puncher to punch out the nori for the nose. Or you can freely cut out if don't have any puncher :)
Step 8: After punch out the nori can decorate the piggy sushi.
Ta-daa.....here is the finishing touched with some decoration! Sleepy piggy sushi....time to wake up!!! Sunny up egg bright and shine waking the piggy :p Haha....
Well, hope you will like this tutorial ^_^ Cheers!
Step 8: After punch out the nori can decorate the piggy sushi.
Ta-daa.....here is the finishing touched with some decoration! Sleepy piggy sushi....time to wake up!!! Sunny up egg bright and shine waking the piggy :p Haha....
 |
| ~Sleepy Piggy Sushi~ |
What I've used:


really like your pictorials on these cute sleeping piggies....good job dear!!
ReplyDeleteAwww....thanks dear Michelle ^_^ I'm sure you can roll better than me :)
Deletewoo~
ReplyDeletethanks for sharing!
you did a very neat job! :)
hehe...thanks dear ^_^
DeleteThanks for sharing this cutey piggies~!
ReplyDeleteawww.....thanks dear Sannee ^_^ Hope to see your piggy too!
DeleteYou make this look so easy! Thanks for the tutorial. ^_^
ReplyDeleteThanks dear ^_^
DeleteI always enjoy reading your tutorials! Without it, I would have no idea how to roll the sushi to shape like piggy! Super cute!
ReplyDeleteAww...you are too kind Nami ^_^ Thank you so much and happy that you've enjoyed reading!
DeleteThank you so much for this awesome tutorial :)
ReplyDeleteMost welcome Kha Lam ^^
Delete